
In this Article
- Why Do Handmade Wire Stitch Markers Catch on Delicate Yarn Plies?
- Matching Wire Gauge and Metal Temper to Knitting Needle Circumference
- Bench Tools Required for Burr-Free Wire Cutting and Deburring
- Step-by-Step Protocol for Coiling, Cutting, and Work-Hardening Markers
- Encapsulating Wire Ends and Sealing Crimp Beads Against Fiber Friction
- Executing the Mohair Drag Test Before Placing Markers on Your Needles
Why Do Handmade Wire Stitch Markers Catch on Delicate Yarn Plies?
Why do so many DIY wire stitch markers shred haloed fibers like mohair and alpaca within a few rows of knitting? The answer sits right at the cut face of the metal. When you snip wire with standard household pliers, the blades pinch the metal from both sides, leaving a sharp microscopic ridge at the tip. As that marker slides from the left needle to the right, that tiny ridge acts like a serrated hook against your yarn.
Pair that ragged edge with an unsealed jump ring, and the problem compounds. A tiny gap where the two wire ends meet creates a pinch point on the scale of a single yarn filament. Even if the loop feels smooth against a fingertip, individual hairs of brushed suri or kid mohair slip straight into the seam and snap when you work the next stitch.
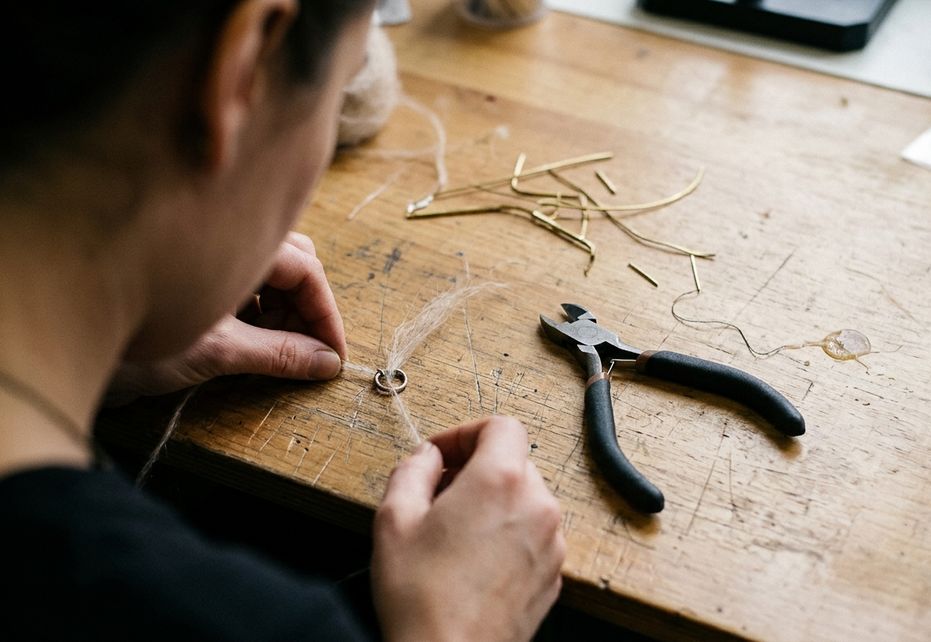
Over several months of workshop garment construction with handmade markers, those micro-burrs proved relentless. We ran custom wire rings across lace-weight silk, single-ply merino, and brushed suri alpaca to see exactly when and how the metal interfered with the fabric. Filament lifts on brushed suri and mohair commonly appeared within the first handful of rows, long before a sweater yoke or lace repeat could even establish its rhythm. Inspecting those rejected markers under a 10x jeweler's loupe showed the exact culprit every time: a wedge-shaped cutter ridge paired with a seam gap wide enough to trap one stray fiber.
Matching Wire Gauge and Metal Temper to Knitting Needle Circumference
Building a reliable marker starts with pairing the wire thickness to the barrel of your needle rather than the weight label on your yarn skein. If the wire is too heavy, it pushes neighboring stitches apart and distorts your tension; if it is too fine, it bends out of shape the moment you cinch a decrease.
Consulting standard American Wire Gauge (AWG) diameter specifications helps take the guesswork out of matching metal to your knitting patterns. Different needle circumferences demand specific wire thicknesses to glide smoothly without adding bulk between stitches:
- 20 AWG: Best suited for bulky needles measuring about 6.5 mm to 10 mm, offering a sturdy ring that will not slip over large needle tips.
- 22 AWG: The everyday workhorse for worsted and DK weight projects worked on 3.75 mm to 5.5 mm needles.
- 24 AWG: Ideal for fine lace needles between 2.0 mm and 3.25 mm, sitting neatly between delicate stitches without leaving a ladder in the fabric.
Wire temper matters just as much as diameter. Wire is commonly sold as either dead-soft or half-hard. Dead-soft wire bends effortlessly around a mandrel, which sounds appealing until a tight k2tog pulls the loop into a distorted oval mid-row. Half-hard brass, copper, or sterling silver holds its circular geometry under the lateral tension of active knitting.
There is a practical mechanical limit on the ultra-fine end of the scale. While 26 AWG wire narrows the gap between stitches on micro-needles near 1.5 mm to 2.25 mm, it lacks the structural rigidity required for heavy blanket fabric and will quickly warp under the weight of the project.
Bench Tools Required for Burr-Free Wire Cutting and Deburring
Hardware store wire snippers belong in a garage toolbox. Their beveled jaws crush the metal until it snaps, leaving a raised wedge that even aggressive sanding rarely squares off completely.
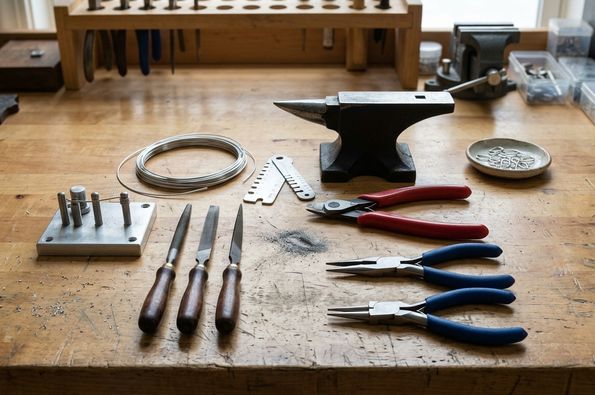
To get a clean join right from the first snip, your bench setup needs jewelers' bypass flush cutters. Instead of pinching, bypass blades shear past one another to leave a flat, perpendicular end face. Once the wire is cut, a few dedicated finishing tools turn that raw metal into a glass-smooth notion:
- Tungsten-vanadium cup bur: A concave, rotating file—commonly a 1.5 mm to 2.0 mm cup—that rounds off the sharp perimeter of a cut wire end in seconds.
- Stepped sanding sponges: Flexible abrasives moving from 400 grit through 800 grit to polish out any faint tool marks along the wire shaft.
- Stepped bail-making pliers or smooth-jaw round-nose pliers: Unmarred steel jaws that curve the wire into consistent loops without biting teeth marks into the surface.
Years of maintaining notions in fiber arts workshops quickly teach you that a cutter is only as good as its jaw alignment. If you snip memory wire or hardened steel pins with your flush cutters, you will nick the blades. That tiny dent transfers a raised burr onto every piece of copper or silver you cut afterward, doubling your sanding time before you even form the loop.
Step-by-Step Protocol for Coiling, Cutting, and Work-Hardening Markers
Once your wire and cutters are lined up on the bench, the actual forming process moves briskly. Taking a marker from raw spool to work-hardened ring usually takes 4 to 7 minutes once the wire is in your hand.
- Coil for needle clearance: Wrap your half-hard wire around a cylindrical mandrel or the matching barrel of your stepped bail-making pliers. Aim for an internal diameter 2 mm to 4 mm wider than your target knitting needle barrel so the finished marker slides freely without binding on the stitch below.
- Execute the two-cut flush method: When you snip the coil off the mandrel, look closely at the flat side of your flush cutters. Make your first cut with the flat side of the blades facing the wire segment you intend to keep. Next, flip the cutters around to trim the opposite end of the loop, again keeping the flat blade against your marker. This two-cut habit leaves both ends with flat, perpendicular faces rather than pinched wedges.
- Form and work-harden the silhouette: Before closing the ring completely, dress the ends with your cup bur (detailed in the next section), then bend the wire into a continuous teardrop or a tucked-loop silhouette where both cut ends point downward into a bead chamber. Place the finished loop flat on a steel bench block and give it a short series of light nylon-hammer taps. Avoid a single heavy strike, which can flatten the wire profile; those gentle rhythmic taps stiffen the metal crystals so the seam stays shut in your project bag.
Encapsulating Wire Ends and Sealing Crimp Beads Against Fiber Friction
Never close a wire loop before deburring its tips. Once two wire ends are pressed together or tucked inside a decorative bead, any remaining sharp ridge is trapped inside a tight crevice where sanding sponges cannot reach, waiting to catch a stray ply of yarn.
Hold the open wire loop firmly in your fingertips, press a 1.5 mm to 2.0 mm tungsten-vanadium cup bur directly over one cut end, and twist the bur back and forth for several seconds. Repeat on the opposite end, then buff both tips with your 400-grit and 800-grit sanding sponges until they feel completely domed. From here, you have three proven methods for hiding the wire seam entirely:
- The mechanical seed-bead tuck: Slide a narrow glass or metal seed bead onto the wire, bring the two deburred ends together, and tuck the exact join deep inside the core of the bead so the yarn only ever touches smooth glass or the continuous top curve of the wire.
- Low-viscosity UV resin encapsulation: For markers built with crimp tubes or decorative charms, apply a tiny droplet of low-viscosity UV jewelry resin right over the metal seam. Small UV beads typically lose their surface tack in 45 to 90 seconds under a jewelry UV lamp, bridging any microscopic gap with a smooth dome.
- Soldered closed rings: If you work with sterling silver or copper and have a micro-torch setup, soldering the jump ring shut fuses the two perpendicular faces into one continuous band of metal before you tumble-polish the batch.
Heirloom Lace Care
Match your sealing method to how the finished knitting will be blocked and laundered. UV resin and adhesive seals soften and cloud after repeated high-heat steam blocking or harsh wool washes. When you are fabricating markers for heirloom lace projects that will stay on the needles for months and face vigorous wet-blocking checks, stick to a mechanical tuck inside a seed bead or a fully soldered ring.
Executing the Mohair Drag Test Before Placing Markers on Your Needles
Discovering a rough seam when a marker is already stranded mid-row on a three-hundred-stitch lace shawl is a headache no knitter needs. Experienced pattern sample knitters run a strict bench inspection on every single notion before it ever touches live stitches, using the fussiest yarn in their stash as the judge.
Pre-Project Bench Checklist
- Match half-hard wire gauge to your needle circumference: 20, 22, or 24 AWG.
- Coil on a mandrel so the inside diameter clears the needle barrel by 2 mm to 4 mm.
- Use the two-cut flush method so both wire faces meet square and flat.
- Spin a cup bur over the cut ends and sand through 800 grit before closing the loop.
- Tuck the seam inside a seed bead or cure with UV resin, then tap with a nylon hammer on a steel block.
Before you slide your newly finished markers onto your project needles, run this 20-to-40-second quality check at your worktable: take a six-inch scrap of loose roving or brushed mohair, pull it firmly across the closed seam of each marker from four different angles, and immediately return any marker that lifts a single filament to the polishing block for another pass with the 800-grit sponge.



Discussion
No comments yet. Be the first!
Write a Comment