
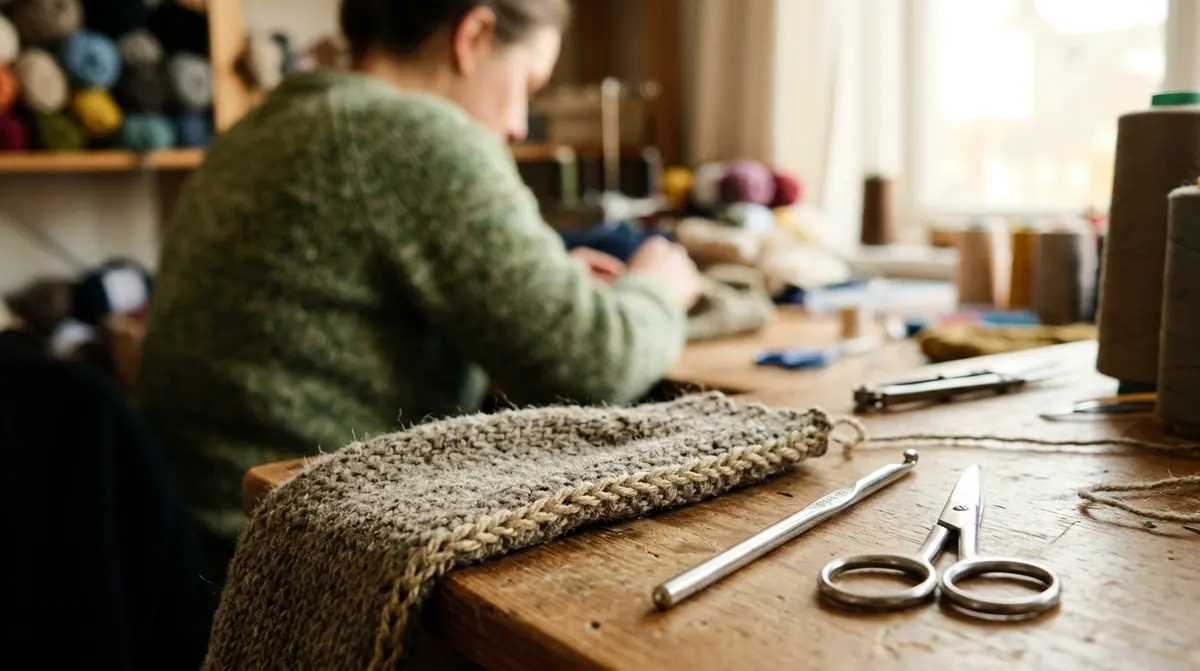
From Island Knitting to the Crochet-Reinforced Steek
The cardigan begins as a closed tube. Colors travel around it, the pattern grows without interruption, and the future front opening remains a narrow strip of knitting. Only later do the scissors turn that tube into something a person can put on.
That order of work grew from practical constraints in Shetland and Fair Isle. Working stranded colorwork in the round kept the knit side facing the maker and avoided the slower business of purling with several colors. Double-pointed needles, sometimes supported by a knitting belt, suited this continuous work. In North Atlantic communities shaped by fishing and cold weather, dense wool fabric supplied welcome warmth.
Armholes and cardigan fronts could wait until the knitting was finished.
Traditional raw-cut steeks depended on the fabric itself: closely worked stitches and wool with enough surface friction to hold neighboring strands together. The wool’s character mattered more than residual lanolin alone. A dense, gripping fabric could keep its cut edges stable without a sewn or crocheted line.
Crochet reinforcement adds a visible holding structure to that older practice. Two chains secure the knitting beside the intended opening, leaving a clear route for the blades. Worked in a slightly finer wool, they make a flexible edge without a heavy seam.
For a modern knitter facing a first steek, those chains offer something useful before the cut: a boundary that can be inspected, adjusted, and understood. The preparation deserves as much attention as the scissors.
Choose Wool That Can Hold a Cut Edge
A soft skein can feel reassuring in the hand and still be the wrong material for this method. Crochet reinforcement depends on friction between the garment yarn and the reinforcement yarn. Slippery strands can move through a perfectly tidy chain.
Non-superwash wool has overlapping surface scales. Together with surface fibers and a suitably dense fabric, those scales help neighboring strands grip, particularly as moisture and handling encourage them to settle together. Shetland, Peruvian Highland, and woolen-spun Corriedale are useful candidates when the actual yarn has that toothy surface.
Keep this version of crochet steeking to non-superwash, multi-ply animal wool. Cotton, linen, and bamboo do not have wool’s scale structure. Superwash treatment alters or covers that structure, reducing the grip this technique needs. Those yarns call for a machine-sewn reinforcement approach rather than reliance on a crochet chain.
Spin Changes the Grip
- Woolen-spun: Its airy structure and projecting fibers generally encourage neighboring stitches to cling. It is the more forgiving starting point for this method.
- Worsted-spun: Its smoother, more aligned fibers produce clearer stitches, but often less surface grip. Assess the actual yarn in a cut swatch before committing a garment.
Breed names and yarn reviews can narrow the choice; a washed swatch supplies the useful evidence. Knit the planned bridge, reinforce it, cut it, and handle the edge as it will be handled during finishing.
Make the Chain Visible
Choose a slightly thinner, toothy wool for the reinforcement. Lace-weight or light fingering wool used singly can keep the ridge modest. A contrasting color makes missed rows and uneven loops easier to spot.
Build a Steek Bridge With a Clear Cutting Lane
The steek bridge is extra fabric reserved for the opening. Its stitches sit between markers separating the bridge from the garment body. After cutting, the two halves become allowances that fold toward the inside.
A five-stitch bridge provides a center column and two columns on either side. A seven-stitch bridge adds another buffer column at each edge, useful for a looser fabric. When converting flat knitting patterns, account for the bridge separately from the garment’s intended width and button-band construction.
Color placement makes this small strip easier to read. Alternate the colors across the bridge in narrow vertical stripes, or change their placement each round for a checkerboard. Both arrangements keep floats short. Carrying one color across the entire bridge creates loose strands exactly where the hook and scissors need an unobstructed path.
Work the center stitch purlwise on every round. Viewed from the right side, that column forms a recessed track between the neighboring knit columns. The fingers can find it even when dark colors make the individual loops difficult to distinguish.
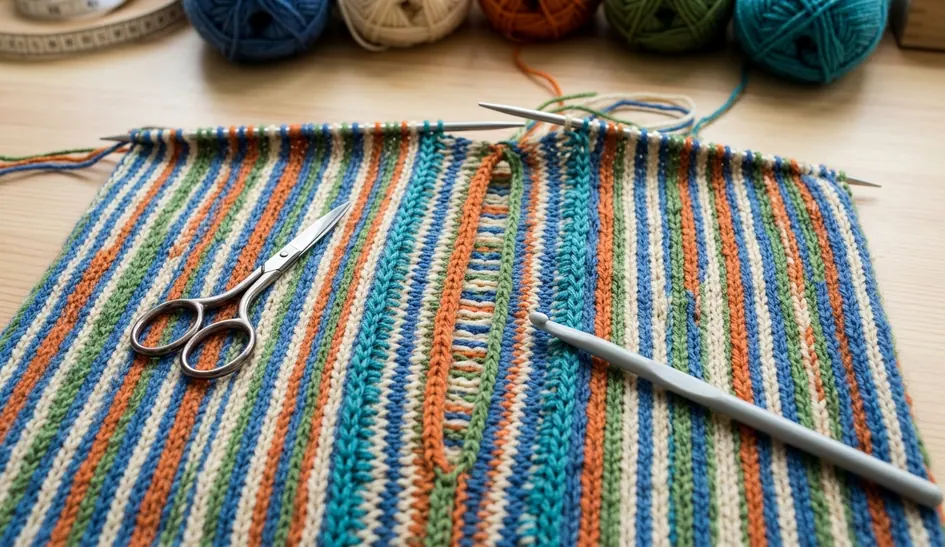
Before picking up the hook, identify the center column from hem to neckline. Follow it with a blunt needle or fingertip. Check that the bridge stays between its markers and that no stray float crosses the cutting lane.
This is also the moment to catch a planning mistake. A reinforcement chain cannot restore garment width accidentally assigned to the steek allowance.
Work Two Slip-Stitch Chains Without Shortening the Front
The crochet should sit close to the fabric while allowing the front edge to retain its length. A rigid, cordlike chain can pull a beautifully knitted cardigan into a puckered opening.
Start with a hook one or two sizes smaller than the needles used for the body. For fabric knitted on 3.25 mm needles, a 2.25 mm to 2.75 mm hook is a practical starting range. Let the swatch decide which hook catches the strands cleanly without forcing them.
Follow the Stitch Legs
- Lay out the bridge. Place the garment right side up with the hem nearest the working hand. Locate the center purl column and the two knit columns immediately to its left.
- Catch the paired legs. Insert the hook beneath the right leg of the knit stitch immediately left of the center column and the left leg of the next stitch outward. Check that the hook has caught both intended strands, with no float underneath.
- Form the first loop. Draw the reinforcement yarn through the paired legs. Leave a tail for securing later.
- Continue row by row. At the next row, catch the corresponding pair of legs, draw yarn through them, and pull that new loop through the loop already on the hook. Repeat toward the neckline, making one slip stitch for each knitted row.
- Reinforce the other side. Return to the hem and mirror the placement beside the center column: catch the left leg of the stitch immediately right of center and the right leg of the next stitch outward. Work upward again.
- Inspect both chains. Secure the working loops and check every row for missed legs, split strands, or accidental catches across the cutting lane.
Keep the fabric supported as the hook advances. Pulling the garment away from the hook can disguise an over-tight chain; letting it bunch in the lap makes consistent placement harder.
Keep the Front Flat
Pause and spread the bridge flat. Ripples or a shortened edge mean the chain needs more ease. Loose loops that stand away from the captured strands need tightening. Correct either problem before cutting, while the knitting remains intact.
The center cutting column should remain clearly visible between the finished ridges. Follow each chain with a fingertip—an abrupt gap deserves a closer look.
Cut the Center and Fold the Allowance Inside
Light steam helps the reinforced bridge settle before cutting. Lay the fabric flat on a protected, firm surface, hover the steamer or iron above it, and avoid pressing weight onto the wool. Let the bridge cool before moving it. This preparation does not substitute for a suitable yarn or a sound reinforcement chain.
Check Before Cutting
- The garment and reinforcement yarns have the required woolly grip.
- Both chains catch the intended stitch legs throughout the opening.
- The front lies flat, without gathered or loose sections.
- The center cutting lane is visible and clear of stray strands.
- The back of the garment is completely clear of the blades.
Use sharp, short-bladed embroidery or tailor shears. Keep the bridge flat on the work surface and make small snips along the center ladder between the crochet ridges. Watch the blade tips. Lifting a handful of fabric to cut in midair makes it harder to see what sits underneath.
Once the opening is cut, handle the edges gently while preparing the bands. Pick up stitches through the crook of the outer reinforced column, following the pattern’s pickup instructions and checking that the band lies flat.
Fold the remaining allowance inward. Loose herringbone stitches can hold it against the back of the band without pulling through to the public face. A ribbon facing offers another finish; keep its attachment relaxed enough to move with the knitted fabric. Complete the planned wet-blocking after the band work.
At the worktable, a knitter turns the new cardigan inside out and smooths the allowance with a thumb. The needle catches the back of the band, then the folded wool. On the outside, the colorwork continues cleanly to the opening.


Discussion
No comments yet. Be the first!
Write a Comment