

In this Article
- The Evolution of the Knitter's Toolkit
- Criteria for Selection: Utility Over Novelty
- 7 Essential Knitting Notions Every Beginner Needs
- Organizing and Maintaining Your Toolkit
- Assemble Your Kit and Cast On
The Evolution of the Knitter's Toolkit
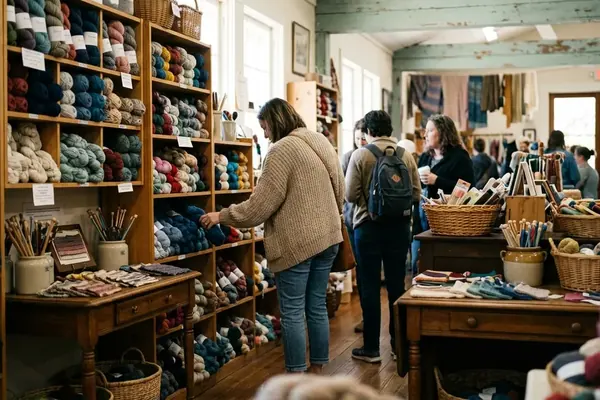
A beginner standing in front of the tools & notions wall at a yarn shop can feel as if knitting requires a miniature hardware store. Cable needles, pom-pom makers, gauge frames, counters, blockers, bobbins, claws, clips: the display is cheerful, but it can also be loud.
The older toolkit was quieter.
Early fiber artists worked with what they could shape and carry. The Textile Research Centre in Leiden, in its historical context of knitting accessories, documents carved bone needles in use from the 1880s onward, alongside other simple knitting tools. Stitches lived on carved sticks, bone needles, and the knitter's own judgment. A sleeve was measured against an arm. A sock was checked against a foot. A count lived in memory, or in a small mark made somewhere nearby.
That changed as knitting moved into printed patterns, commercial yarn, and more standardized sizing. Between roughly 1920 and 1950, standardized measuring tools became part of the knitter's ordinary kit. The industrial revolution did not merely produce more yarn; it produced expectations. Yarn weights became easier to compare. Pattern instructions grew more precise. A knitter now needed to know not just that a piece looked wide enough, but whether it matched gauge, whether the armhole reached a stated length, and whether a shaping repeat landed on the correct stitch.
Stitch markers, measuring tapes, and blunt needles came from that practical pressure. They solved small problems that could ruin large projects.
Modern craft stores may offer thousands of gadgets, but the foundational kit has barely changed in spirit for more than a century. The best beginner notions still answer the same questions: Where am I in the pattern? How big is this piece? How do I finish it cleanly? What tool helps me fix a mistake before it becomes a sweater-sized problem?
Criteria for Selection: Utility Over Novelty
The safest beginner purchase is not the shiniest one. It is the notion that gets used on scarf number one, hat number two, and the first sweater that makes a new knitter both proud and slightly nervous.
For this list, the filter was narrow on purpose. While our editorial team has tested many specialized knitting gadgets over the years, this collection is limited to foundational tools that prevent common beginner mistakes and help finish a standard pattern cleanly. The review drew from published beginner knitting patterns in the ply_yarn archives from around 2015 to 2023, with priority given to notions appearing in more than 80 percent of those patterns.
That archive review overlooks regional differences in needle sizing conventions, so needle-related advice here favors function over any single country's labeling system.
Three criteria mattered most:
- Frequency of use: each item had to serve a purpose at least once per finished project under about 500 grams of yarn.
- Durability: tools had to hold up across roughly a year of weekly handling, not just survive a tidy photo on a desk.
- Beginner-friendliness: anything requiring battery replacement or calibration beyond basic use was excluded.
That last point matters. A row counter can be useful; a device that needs an app login before a beginner can track garter-stitch ridges is not. A flexible tape measure belongs in the pouch; a rigid dressmaker's ruler can stay on the cutting table.
Note: An essential notion is something that helps a knitter complete an ordinary pattern. A luxury notion makes the work more pleasant but can be skipped without putting the project at risk.
This distinction saves money and reduces clutter. It also builds confidence. A beginner who learns to use a small group of tools well will make better decisions later when browsing ergonomic hooks, blocking tools, yarn winding equipment, and more specialized techniques & tutorials.
7 Essential Knitting Notions Every Beginner Needs
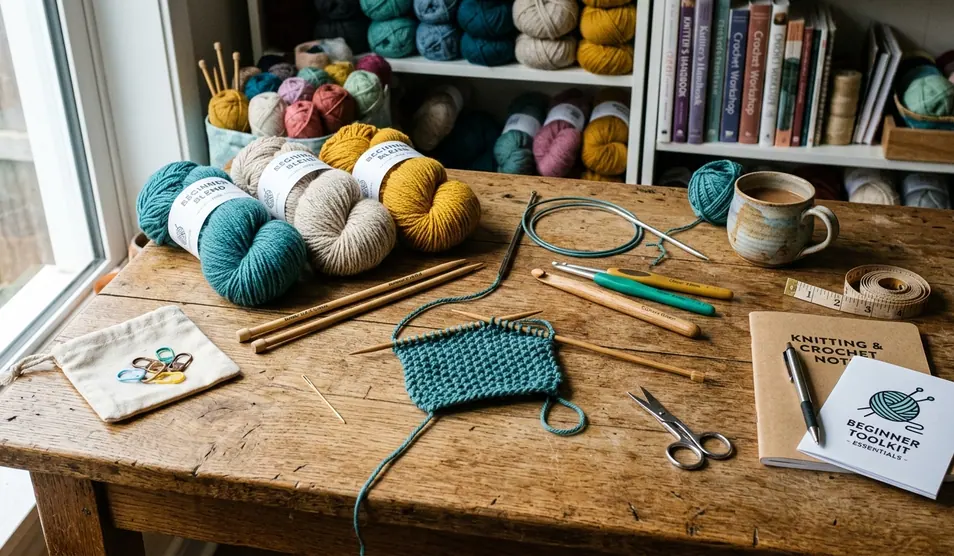
The seven notions below are not glamorous. That is their strength. They earn their spot because they solve the same problems again and again: loose ends, lost counts, uncertain measurements, dull cuts, mystery needle sizes, dropped stitches, and live stitches slipping off the needle in a project bag.
1. Tapestry Needles
A knitted project is not finished when the last stitch comes off the needle. It is finished when the ends are woven in, seams lie flat, and the fabric looks intentional from the wrong side as well as the right side.
That is the job of a tapestry needle. Choose a blunt-tipped needle rather than a sharp sewing needle. The blunt end slides between strands instead of piercing and splitting the yarn. For worsted-weight yarn, needles in the 13-16 cm range give enough length to control the tail without feeling clumsy in the hand.
On a beginner scarf, a tapestry needle weaves in the cast-on and bind-off tails. On a hat, it closes the crown. On a simple sweater, it seams shoulders and sides. No finishing tool gets used more quietly or more often.
2. Stitch Markers
Stitch markers are tiny boundaries. They tell the knitter where something changes: the start of a round, the edge of a lace repeat, the place where increases happen, or the point where ribbing becomes stockinette.
Closed-ring markers slide onto the needle and move along as the work grows. They are excellent for marking repeat sections in knitting patterns or separating front, back, and sleeve sections on circular needles. Locking markers open and close like small safety pins, so they can attach directly to a stitch. Use them to mark the right side of the fabric, catch a dropped stitch, or count rows in a textured section.
For a beginner kit, locking markers sized to fit needles up to 8 mm diameter cover a broad range of common projects. A few closed rings are still worth adding, especially for circular knitting.
Quick Tip: Keep markers in two colors. Use one color for the beginning of a round and the other for pattern repeats.
3. Measuring Tape
Gauge is where many beautiful plans meet reality.
A flexible, retractable fiberglass tape is the most useful measuring tool for beginner knitters because it can curve around sleeves, hats, and collars without adding much bulk to the project bag. It checks the width of a gauge swatch, the length of a scarf, the depth of an armhole, and the circumference of a hat.
Fiberglass matters because it resists stretching better than many soft cloth tapes, but it is not permanent. Replace the tape after visible kinks form, especially near the first few inches where it is pulled most often. In regions where fiberglass tapes are not easy to find, choose the least stretchy flexible tape available and compare it occasionally against a rigid ruler.
4. Small Sharp Scissors
Good scissors make finishing feel neat instead of ragged. They cut yarn tails cleanly, trim knots from a new skein, and remove temporary waste yarn without chewing the fibers.
The beginner does not need heirloom embroidery scissors, though those are lovely. A compact pair with sharp tips is enough. The important habit is separation: do not use the same scissors for tape, paper labels, plastic packaging, and yarn. Adhesive residue dulls the cut and leaves drag on the blades.
Frequent users should plan on sharpening or replacing small scissors roughly every 6-9 months. The first sign is not always a visible nick. Often, the scissors simply start pushing yarn away before they cut it.
5. Needle Gauge
Needles lose their labels. Interchangeable tips migrate between cases. A circular needle pulled from the sofa cushion after two weeks may look close enough to use, which is exactly how gauge trouble begins.
A needle gauge solves the mystery. Slide the needle through the holes until it fits without force. That reading gives the working size, not a hopeful guess based on memory or color. This is especially useful when a pattern calls for 5 mm needles and the knitter owns several similar-looking tips.
It also supports better yarn reviews at home. When a new yarn behaves differently than expected, the knitter can check the actual needle size before blaming the fiber.
6. Row Counter
Rows disappear in plain sight. A beginner may knit six rows of ribbing, answer a text, make tea, come back, and suddenly have no idea whether the next row starts the body or continues the cuff.
A simple row counter keeps that decision out of memory. It can be a barrel-style counter on the needle, a clicker in the pouch, or a small mechanical counter kept beside the pattern. The form matters less than the habit: advance it at the same moment every time, usually after completing a row or round.
For crochet and knitting alike, consistent counting prevents lopsided pieces. It also makes it easier to repeat a sleeve, mitten, or sock without turning the second one into a guessing game.
7. Repair Hook
A small crochet hook belongs in a knitting toolkit even for knitters who do not crochet. It is the fastest way to rescue a dropped stitch before it travels down several rows.
The repair is simple in principle: catch the loose loop, draw each horizontal strand through in order, and place the stitch back on the needle. The first time feels fiddly. The third time feels like a small superpower.
Choose a hook small enough to move through the fabric without stretching it badly, but not so tiny that it splits the yarn. For worsted projects, many knitters keep one mid-sized hook in the pouch and adjust later as their yarn habits change.
Summary: The essential beginner toolkit is small: tapestry needles, stitch markers, measuring tape, scissors, needle gauge, row counter, and repair hook.
Organizing and Maintaining Your Toolkit
A notion is only useful if it can be found while the stitches are still on the needle.
The classic beginner problem is not lack of tools. It is tool drift. Markers fall into the bottom seam of a tote. A tapestry needle gets stuck in the sofa arm. The measuring tape is in the other project bag because last weekend's hat needed it. Then the knitter improvises, skips a check, and pays for it later in uneven shaping or sloppy finishing.
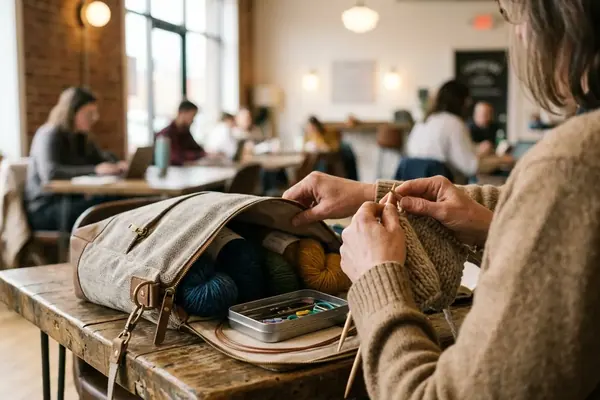
Use a dedicated zippered pouch. A 15 by 20 cm pouch holds all seven items without overlap when packed with a little care. Put flat items together: needle gauge, measuring tape, and row counter. Keep sharp scissors capped or turned inward. Store tapestry needles in a small tube, magnetic case, or folded packet so they do not poke through the fabric.
The pouch should move as one unit from project to project. Notions should not be repacked each time.
- Check the measuring tape for kinks before measuring gauge.
- Wipe scissor blades if they have touched tape, labels, or adhesive packaging.
- Count stitch markers after finishing a project, especially locking markers used as temporary row markers.
- Return the repair hook immediately after fixing a dropped stitch.
- Keep one tapestry needle threaded with a scrap of contrast yarn when trying provisional fixes or holding live stitches briefly.
This is ordinary maintenance, not a ceremony. The reward shows up when a pattern asks for a measurement and the tape is already there, or when a dropped stitch appears and the hook is not hiding under three skeins of yarn.
Assemble Your Kit and Cast On
The best way to learn tools is to use them before the project feels precious.
Start with one small zippered pouch. Place one of each essential notion inside: a tapestry needle, a few closed and locking stitch markers, a flexible measuring tape, sharp scissors, a needle gauge, a row counter, and a repair hook. Close the pouch. Open it again. The point is to make the location familiar.
Now cast on a practice swatch immediately. Use 5 mm needles and cast on 20 stitches. Place a stitch marker after the first three stitches and another before the last three, just to practice moving markers as you knit. Work until the fabric is large enough to measure a 4x4 inch section, then use the measuring tape to check width and height without stretching the swatch.
Cut the yarn with the scissors, weave in the ends with the tapestry needle, and use the row counter while you work so the motion becomes automatic. If you can, deliberately drop one stitch near the edge and repair it with the hook before binding off.
Put the finished swatch beside the pouch, reset the row counter, return every notion to its place, and cast on the first 20 stitches today.


Discussion
No comments yet. Be the first!
Write a Comment