

Mapping Spatial Relationships in Fiber Art
A crochet chart functions as a precise visual schematic, mapping exactly where a stitch sits relative to the stitch below it. This spatial relationship forms the core of diagrammatic reading, prioritizing structural architecture over sequential naming. Crafters rely on these grids to understand the fabric's geometry before picking up a hook. Many motif pamphlets present complex lace patterns entirely without written rows. In these publications, the visual schematic bypasses linguistic barriers completely. Crafters across different regions can work the same oval-and-bar set without translating prose. The standard international glyphs provide a reliable foundation for most published diagrams.
An open oval represents one chain stitch, forming the airy spaces in lace designs. A filled oval or a solid dot indicates a slip stitch, typically used for joining rounds or traveling across stitches without adding height. A plus sign or an X marks a single crochet, occupying exactly one chain-width on the grid. Some designers occasionally employ custom variations in their specific legends. A common substitution involves swapping a teardrop for the chain oval. Recognizing these core shapes allows the crafter to interpret the foundational structure of any charted design. The spatial arrangement on the page mirrors the physical interlocking of the yarn, offering a direct visual translation of the finished piece.
The Anatomy of Stitch Height and Yarn-Overs
The visual logic of these symbols mimics the physical appearance and height of the actual stitches—a design choice that aids immediate comprehension. The hook builds fabric in a specific order of height, progressing from the chain to the slip stitch, the single crochet, and finally the barred family of stitches. The oval-for-chain and plus-for-single pair serves as the natural entry point for reading charts. Both of these marks sit in every first-round ring of a circular motif, establishing the base for outward expansion.
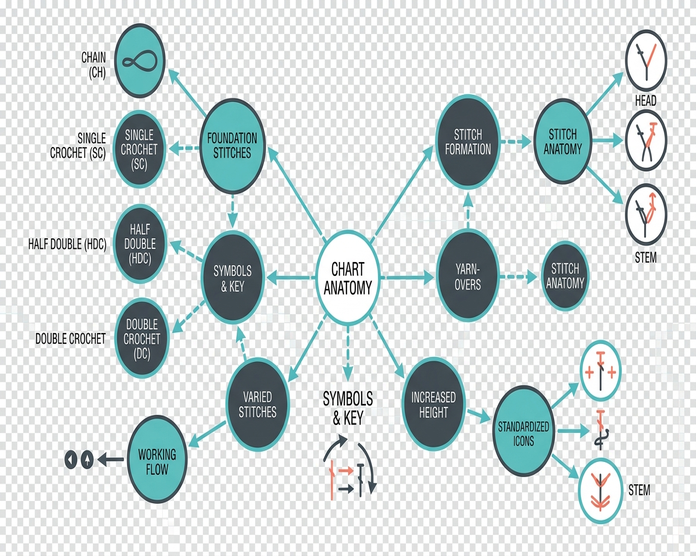
Taller stitches follow a strict visual rule based on the barred-T stem. Each added crossbar on the stem correlates directly to one extra yarn-over required before insertion into the fabric. A double crochet features one horizontal bar on the stem and requires one yarn-over. Two bars mark a treble crochet, corresponding to two yarn-overs. A double treble carries three bars for three yarn-overs. The half double crochet sits between the plus of the single crochet and the one-bar double. It is represented by an unbarred T, reflecting its intermediate height and the single yarn-over pulled through all loops at once.
Complex or novel stitches drawn with nonstandard glyphs require careful attention. Crafters must read these specific symbols from that pattern's own legend rather than relying on the barred-stem yarn-over rule. This systematic approach gives a practical way to identify stitch heights at a glance, streamlining the crafting process and reducing the cognitive load during intricate pattern execution.
Directional Flow Across Flat and Circular Grids
Entering the grid on the wrong edge wrecks the stitch count even when every glyph is correctly named. Flat charts default to a bottom-up reading path. The foundation chain sits on the lowest line of the diagram, establishing the base for all subsequent rows. Alternating directional flow follows the physical turning of the fabric at the end of each row. Odd-numbered rows represent the right side of the work and read right to left. Even-numbered rows represent the wrong side and read left to right. A row number printed on the right edge indicates that the row begins on the right. A number on the left edge means the row begins on the left.
Working in the round requires a different navigational approach. Crafters start at the center and travel outward in a counter-clockwise direction. Each round typically closes with a slip stitch into the top of the beginning chain. Misreading the starting edge remains one of the most common sources of pattern deviation.
Essential Grid Navigation Checkpoints
- Match the legend to international ovals, plus-signs, and barred stems.
- Find the starting row number and which edge of the grid it sits on.
- Mark the piece as flat (alternating directions) or in the round (center out, counter-clockwise).
Converting Visual Syntax into Standard Abbreviations
Translating a sequence of visual symbols into standard written crochet abbreviations allows crafters to keep a paper key beside the chart. This one-row transcription process converts spatial data into linear US abbreviations, providing a dual-reference system for complex patterns. Clusters sharing one base stitch map directly to specific phrasing. Three double-crochet symbols sharing one base stitch write as '3 dc in next st'. This phrasing matches exactly how the action is spoken at the hook, reinforcing the connection between the visual symbol and the physical movement.
A 3-dc group sitting in a chain space translates to '3 dc in next ch-sp'. A classic granny corner consisting of two 3-dc groups separated by a chain-2 space writes as '(3 dc, ch 2, 3 dc) in next ch-2 sp'. Identifying repeating segments requires careful observation of the visual syntax. Bracket these repeats only after the identical run appears twice in one row. This deliberate bracketing avoids creating false repeats around coincidental pairs of stitches that do not form a continuous pattern. Counting stitches in the chart ensures the written translation maintains the correct stitch count per row. Careful transcription gives you a reliable backup for navigating complex visual sections, especially when encountering dense lace or intricate colorwork.
Executing a Four-Round Square Motif
We will decode a standard four-round square motif starting from the center ring. This specific shape allows the crafter to meet four identical corners and check increases without learning complex hexagonal geometry. The chart's smallest oval cluster sits at the very center of the diagram, marking the initiation point for the center-ring-to-fourth-round path.
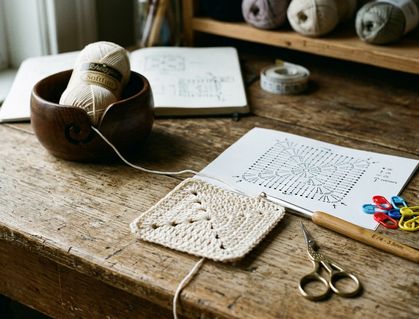
Round 1 begins with a ch 4, joined with a sl st to form a ring. The sequence continues with a ch 3, which counts as the first dc. Work 2 dc into the ring, followed by a ch 2. Repeat the sequence of (3 dc in ring, ch 2) three times. Join with a slip stitch to the top of the beginning ch-3. This completes the round with 12 dc and four ch-2 corners. Unpacking the slip-stitch join ensures it is not mistaken for an extra stitch, maintaining the structural integrity of the motif.
Round 2 maps the visual increases at the corners to physical actions. Slip stitch to the first ch-2 sp. Work (3 dc, ch 2, 3 dc) in each ch-2 sp, adding a ch 1 between the corners, and join. Rounds 3 and 4 expand the square outward. Work (3 dc, ch 2, 3 dc) in each corner space. Place 3 dc in each side ch-1 space, with a ch 1 between groups. Worked in worsted weight on a 5 to 5.5 mm hook, this four-round motif comes off the hook at roughly three and a half to four and a quarter inches square—block it, measure it, and you will know whether your tension needs a half-size adjustment before you commit to ninety more squares.









Discussion
No comments yet. Be the first!
Write a Comment