
Stranded colorwork creates a fabric of unparalleled warmth and visual depth. The interplay of two yarns dancing across the needles transforms simple stitches into intricate motifs, building garments that last generations. Yet, the transition from a small test square to a full-sized sweater often introduces unexpected sizing issues. The tension achieved when working back and forth rarely matches the tension of a continuous circular round. Understanding the mechanics behind this discrepancy ensures that the hours invested in a beautiful yoke translate into a perfectly fitting garment.
The Legacy of Continuous Spirals
Traditional Fair Isle and Scandinavian colorwork garments were historically engineered exclusively as seamless tubes. Construction, rather than the specific motif, set the frame for how these pieces were planned and executed. In workshop records from the 1920s through the 1960s that detail garment construction, the body was treated as a closed tube from the hem straight up to the shoulder before any armhole opening was cut.
Early fiber artists developed steeking specifically to avoid the mechanical inconsistencies of purling in pattern. Extant tubular bodies with later-cut armholes show the stranded fabric had always been a continuous knit spiral. This historical evolution established the foundational rule that stranded colorwork tension is inherently tied to continuous forward knitting.
To facilitate this continuous spiral, traditional steek bridges were commonly cast as 8 to 10 extra stitches. This specific allowance ensured that the eventual cut would fall safely inside a column of waste color rather than severing a crucial motif stitch. The entire process prioritized the rhythm and consistency of the knit stitch, bypassing the tension variations introduced by turning the work.
The Physics of the Purl Path
The physical path the yarn takes during a purl stitch requires slightly more yarn than a knit stitch, altering the row gauge. When examining the stitch formation closely, the purl yarn path travels farther around the needle than the knit path. This microscopic difference compounds rapidly—becoming entirely readable to the naked eye after 20 to 30 consecutive rows.
When knitting flat, the alternating knit and purl rows create a microscopic rowing out effect that distorts the fabric's overall density. These alternating rows act as a density engine, subtly shifting the fabric's structure with every turn. In circular knitting, the continuous spiral of knit stitches removes that engine entirely, creating a uniform fabric architecture. This makes flat swatches an inaccurate predictor of circular garment sizing.
To accurately measure this phenomenon, knitters must rest comparison swatches 18 to 36 hours after binding off before taking a 4-inch stitch and row count from the center. The fibers need this time to relax into their final configuration. The knit-versus-purl yarn-path difference is most pronounced in non-reversible stranded knitting and does not carry over to double-knitting, where both faces form in the same pass.
Mapping the Second Layer of Yarn
Stranded colorwork introduces a secondary layer of yarn across the wrong side of the fabric, known as floats. These floats must be mapped as a second yarn layer rather than simply leftover slack. Carrying floats across the back of a continuous circular round restricts the lateral stretch of the fabric differently than flat knitting.
Fair Isle floats are customarily caught every 5 to 7 stitches so the unused yarn cannot form a snagging loop. This frequent catching integrates the floats into the primary fabric, creating a dense, cohesive textile. However, a flat swatch allows the edges to relax and the floats to behave inconsistently at the turns, providing a false measurement of the final garment's negative ease.
Structural Integrity Warning
A steeked-tube gauge reading stops applying the moment the same motif is worked back-and-forth with purl-side color changes, even on identical needles and the same two yarns.
On a 6-inch flat swatch, the turning edges typically let floats slacken across the outer inch to inch and a half. This relaxation leaves approximately the middle 3 inches as a usable density sample. Relying on the edges of a flat swatch for gauge calculations often leads to garments that fit poorly, highlighting the need for a more accurate sampling method.
Simulating the Spiral Without the Tube
To simulate circular knitting without knitting a full tube, knitters use the speed swatch method. A full-tube swatch is often set aside because it delays a sweater start by several evenings. Sliding the work and draping a long back float is kept because every public stitch remains a knit and the center can be measured without selvedge drag.
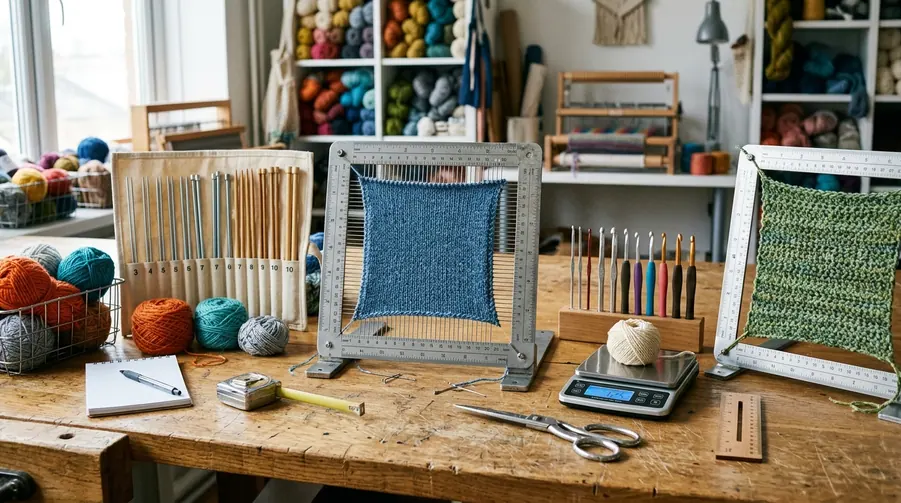
This technique involves knitting across the right side, sliding the stitches back to the other end of the circular needle, and draping a long float of yarn loosely across the back before beginning the next row. After each right-side row, slide the stitches to the opposite tip and drape approximately 8 to 12 inches of both working yarns loosely across the back before the next knit row. The loose floats at the back ensure the edge stitches are not pulled tight, allowing the center stitches to accurately reflect the tension of a continuous round.
- Maintain Slack: Center-four-inch readings on a speed swatch go false as soon as the draped back yarn is shorter than the fabric width, because the selvedge then steals ease the circular yoke would have kept.
- Build Depth: Knit at least 4 inches of motif depth to provide a large enough window for accurate measurement.
- Process the Fabric: Wet-block the finished swatch and allow 24 to 48 hours of drying time before measuring the center 4 inches.
Executing this method gives a reliable picture of how the yarn will behave in the final garment. It bridges the gap between the desire to start a project immediately and the necessity of accurate gauge, ensuring that the resulting knitting patterns produce wearable art.
Setting Up Your Next Project Gauge
The preparation for a speed swatch requires deliberate choices regarding tools & notions. The body circulars must be chosen before the stitch count is determined so the swatch inherits the exact tip geometry as the yoke. Different needle materials and tip tapers subtly influence stitch formation, making it crucial to sample with the exact equipment planned for the main project.
Width is then set at a six-inch floor to keep the measured window safely inside floats that never turn. Cast on enough stitches to produce a fabric at least 6 inches wide on the circular needles reserved for the sweater body. Work one full motif repeat plus 2 extra pattern rows to establish the pattern fully.
Once the knitting is complete, leave the swatch to rest 12 to 24 hours before the first unblocked check. This initial resting period allows the fibers to settle before introducing water. Comparing the unblocked gauge to the final blocked gauge provides valuable insights into how the yarn blooms and shifts, informing future yarn reviews and project planning.
Pull the exact circular needles you plan to use for your sweater body, cast on a minimum of six inches of stitches, and knit the first right-side row of your colorwork motif right now.
Discussion
No comments yet. Be the first!
Write a Comment